|
0 Comments
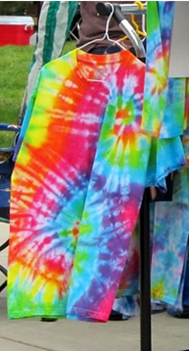 Article by Chris Robertson Even if you’re not a child of the 60s, you’ve probably had the pleasure of owning and wearing tie dye clothing. If you’ve ever been to an event with a craft fair, chances are that you’ve noticed those eye-catching booths full of colorful tie-dye clothing and home decor. You may even have marveled at how they manage to incorporate those intricate, vibrant designs onto a plain cotton T-shirt. While intricate tie dying is truly an art, you and your family can have loads of fun at home making your own tie dye creations. Hands down, the best way to learn how to tie-dye is through instructions demonstrated on a video or DVD. Seeing how it’s done, as opposed to reading about it, makes all the difference in the world. Still, tie dye is a process of trial and error, so why not give it a whirl (or a swirl)?It’s All About the Fabric When it comes to tie dye, the right fabric is critical. Natural fibers – like cotton or linen, pick up the dye well. If you stick with 100 percent cotton, you can’t go wrong. To start with, why not pick up some inexpensive T-shirts at your local mass merchandiser? Get one for each family member, and make it a party! Remember, though, that you need to wash and dry the new garments before you start your tie dying party. Unwashed new fabric won’t pick up the dye very well. The Secret of Dyes Actually, the dyes you use to tie-dye aren't a big secret. For cotton, you need to use a dye that will react well to the fabric, namely Procion MX, dissolved in a urea solution. You can make virtually every color imaginable with just three colors: yellow, turquoise, and fuchsia. But, before you start dying, you need to soak your fabric in soda ash. Tie dye artisans use a few other chemicals as well, which you can learn about on an instructional DVD or video. The Fun Part: Patterns. Tie-dye is all about colors and patterns. Learning how to make swirls, crinkles, stripes, wavy lines, hearts, clovers, and – yes – even peace signs is a great way to engage the creativity of everyone in the family. You can learn to tye knots; twist fabric into pancake shapes secured by rubber bands; roll a shirts to form tubes, which you then tie; and pleat the fabric to make symmetrical patterns.Applying the Dye. There are at least six different techniques you can use to apply the dye to your fabric, from dipping and soaking to using squeeze bottles and spray bottles. Again, someone with years of experience can best teach you how to apply dyes to get the results you want. Making it Stick After tie dying your shirts or decor, it’s important to follow the steps necessary to make sure the dye reacts with the fiber. Then you need to repeatedly wash the fabric in a special solution so that the dyes don’t inadvertently mix and so the garments remain colorfast. Ultimately, though, tie dye is all about having fun. Chris Robertson is an author of Majon International, one of the worlds MOST popular internet marketing companies.For tips/information, Tie Dye Visit Majon’s Crafts and Hobbies directory. Below see supplies and gifts for tie dye crafts on Amazon: 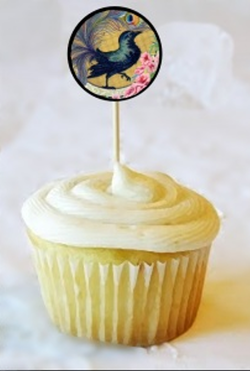 Make your own toppers for any special occasion. See the button below to print a free collage sheet of circle images for Halloween. Print the image sheet and then cut out the circles. Glue onto a sturdy piece of cardboard. Insert a tooth pic on the back. Try this tip to protect the circle cupcake topper from fingerprints and longer life: Place a sheet of clear mat contact paper over the circles before you cut them out. Press and smooth out any bubbles. Create Wedding, Birthday or Baby Shower Cup Cakes! Make wedding or special occasion cupcakes for friends and loved ones. Pick a vintage image or a floral design from a public domain source on Google. Once you find the image save it to your computer . Call the image in a editing program to crop it as a circle. A great software program that is free to is PhotoScape. 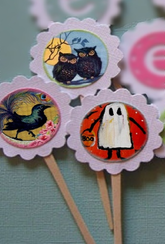
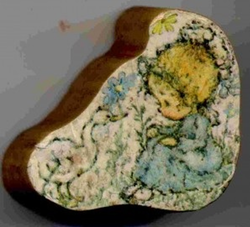
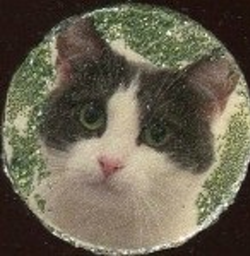
Instructions: Print out the sheet of circle images on lightweight card stock, such as a watercolor paper 90 lb in weight. Next, cut out a 2 circles and sandwich a toothpick in between the 2 circles adding a spot of Elmers glue to hold the stick in place. Let dry. 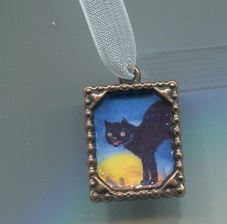 Use public domain images to create tiny jewelry treasures. Look up cats, flowers, butterflies etc. in the public domain category. Print these images out in color. Place a sheet of frosted or clear contact paper over the image you printed. Burnish or rub the image firmly to get any bubbles out. Cut out the image and hit it in a jewelry blank. You can use most any type jewelry glue to anchor the picture into the blank. Purchase jewelry chains to finish your jewelry masterpiece. You can also use a jewelry glaze and that of the contact clear. Using the contact paper means no mess.~~~~~~~~~~~see reference below for jewelry blanks and contact paper. Have fun creating your own unique pendant necklaces. How to Make a Simple Whirligig 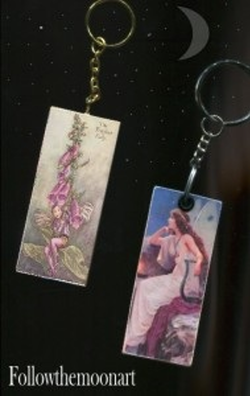 Instructions for making angel key chain craft project from wood: 1) start with a 1 x 3 size piece of wood. A blank wood tag will also work. 2) Cover the print image with a clear contact paper 3) trim the image & contact paper to the size of the wood blank. If you need to make a hole in the wood, this is the point where you will be drilling a 1/4″ hole in the center of the wood at the top. You may also make a hole on the narrow top portion of the wood. The adhere the image on the wood -use a white glue such as Elmer’s. Be sure to smooth out and leave no bubbles. Sand the edges lightly. 3) Attach the key chain. |
Categories
All
Archives
September 2013
|
